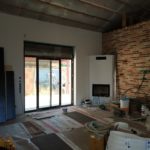
The most common thing that everyone gets lost after interior design, starting repairs is in the order of construction work. How to make sure not to forget anything and understand when and what to order and comfortably allocate the budget. Unless, of course, you have decided to contact me for copyright supervision and my team of builders. In the second case, we will plan the entire construction and repair process for you. So, after the finished interior design, there is a certain order of implementation in the repairs.
The sequence in different projects may differ, but the general meaning is the same.
We divide the work into stages that can go sequentially or in parallel.
Rough work:
1. Dismantling is what every repair begins with. We dismantle everything old: from the baseboard to the partitions. After packing and garbage removal from the facility.
2. Masonry works — construction of partitions made of bricks/gas blocks/gypsum blocks, etc.
3. Plastering works – leveling of all existing walls, output of the level and common axes of the walls.
4. Replacement of windows.
Engineering (1st stage):1. Electrics — laying routes through rooms, forming a shield.
2. Plumbing – laying pipes to wet areas, forming combs, purging the system.
3. Heating — laying pipes to heaters, purging the system.
4. Air conditioning — laying of highways, condensate drainage, installation of outdoor units, purging of the system.
5. Weak point (Internet, alarm system, telephone, radio …) — laying through the rooms.
Installation of underfloor heating, filling and leveling of the general floor level in the apartment.
Drywall (1st stage):
1. A set of wall frames.
2. A set of ceiling frame.
3. Plasterboard wall stitching.
Engineering (2nd stage – installation of points):
1. Electrics – installation of adjustable boxes, installation of boxes for sockets / switches, wiring points for lamps.
2. Plumbing – installation of terminals for faucets, sewerage, boiler; installation of hidden elements of built-in faucets, installation of toilet installation.⠀
3. Weak point – installation of mounting boxes.
⠀
Drywall (2nd stage):
1. Installation of mortgages for heavy furniture, chandeliers, exercise equipment.
2. Filling the frame with sound insulation \ insulation.
3. Sewing the frame of the walls with drywall.
⠀
Tile work:
1. Laying tiles on the walls.
2. Laying tiles on the floor.
3. Grouting of seams.
4. Installation of covers, packaging (so as not to scratch the floor).
⠀
Painting works:
1. Installation of window sills.
2. Putty of walls and ceilings (output of the final level), installation of stretch ceilings.
3. Wall painting (1st stage)
4. The output of points and the formation of holes for lamps, sockets, switches.
5. Painting of walls and ceilings (2nd stage).
6. Wallpapering.
⠀
Floors:
1. Installation of the lining under the finishing floor covering.
2. Installation of finishing coating (boards, parquet, laminate).
3. Installation of covers, packaging (so as not to scratch the floor). Rough cleaning. Installation of doors.
Collection of cabinet furniture.
Installation of baseboards.
Installation of sanitary appliances (faucets, boilers, toilets).
Installation of electrical fittings (switches, sockets, chandeliers, lamps, etc.)
Installation of low-current accessories (motion sensors, alarm unit, etc.)
Installation of brackets for TV.
Final cleaning.
Installation of furniture fittings.
Import and import of free-standing furniture.
Installation of mounted decorative elements (frames, paintings, mirrors).
Installation of equipment (TV, washing machine, etc.)
General cleaning.
Textiles – hanging curtains, tulle.
Decorating an object.
A photo shoot of your interior by a professional photographer. A photo with the designer as a keepsake and the opening of a bottle of champagne.
Contact us for interior design and subsequent repairs with author’s supervision. We will make your dream come true!

